Here’s what you need to configure a failover ip in your server’s Virtual machine running Ubuntu >= 18.
You need to by a server (mine is hosted by online.net – aka scaleway)
Then you need to buy a fail over IP from them (from your servers back office
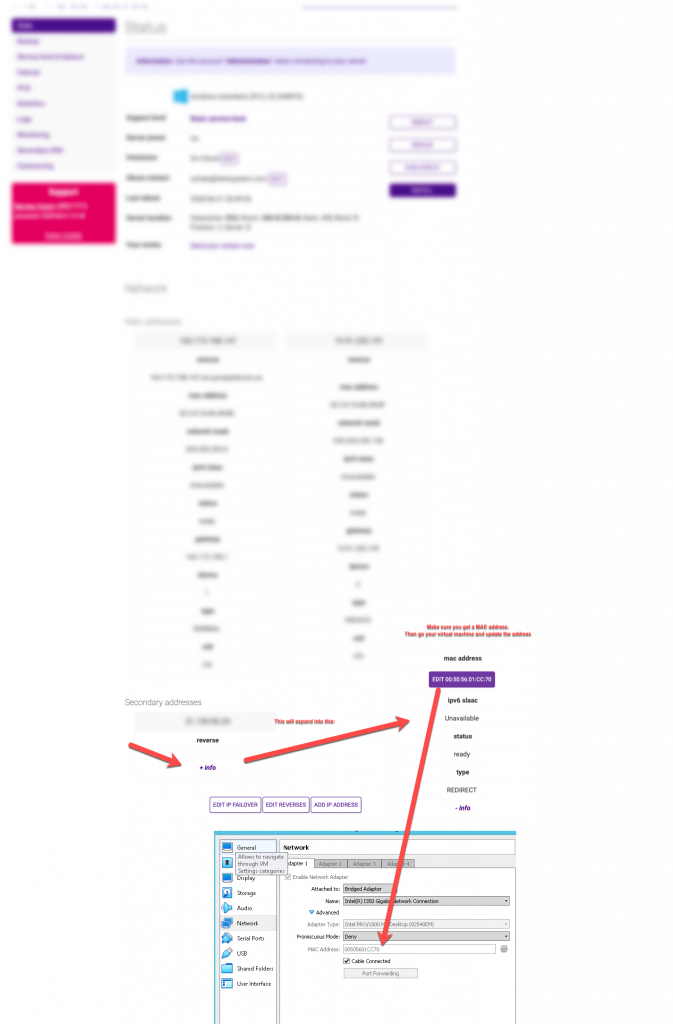
Your virtual machine (mine is powered by Virtualbox) needs to be configured in bridge mode (NAT won’t work) and your virtual network card must use a special MAC ADDRESS (see Img-1 below)
You must know what’s your server’s gateway (in this guide mine 62.210.0.1)
Let’s get started by getting a MAC address for our server’s and set that same MAC address in our VM’s Virtual Network configuration.Img-1. Configuring the mac address1) Create a backup of your netplan configuration file
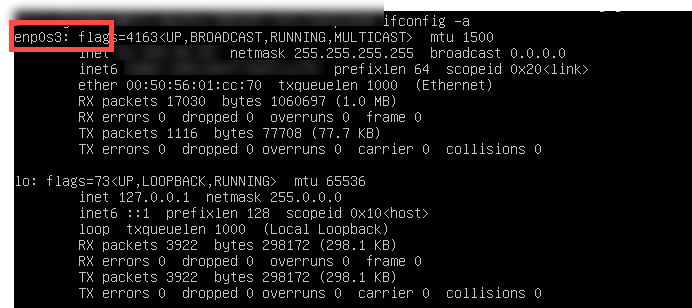
2) Determine your network interface ID (mine is enp0s3)
$ ifconfig -a
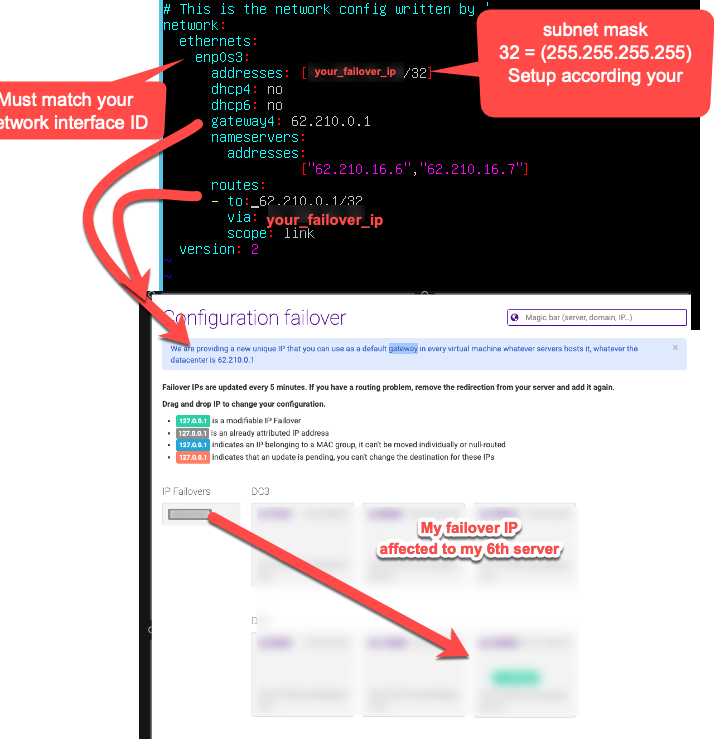
3) Edit your netplan as follows
$ vim /etc/netplan/00-installer-config.yaml
Make sure your netplan file looks like mine but make the necessary changes as indicated in the above picture. As you can see, I show you that I assigned my failover IP to one of my servers (here presented in a blured green)
4) Apply your changes using the command that follows
$ sudo netplan apply
5) Finally, test your configuration5.1) Check that you can reach external servers
$ ping google.pt
5.2) Check that your server is reachable
$ ping YOUR_FAILOVER_IP
If 5.1 and 5.2 worked, then your configuration worked.
Hope it helps.
Leave a thumbs up in the comments 🙂
References: